 Library
Barcode Scanners Customer Displays Public Product List Product Requesting Scales
Email Accounts eCommerce Websites In Store Website
Pre Install Planning Creating a Franchise
Creating and Managing Agency Stores
A agency store is a third party store that sells your products or services on your behalf. A well known example is the dry cleaning model where a dry cleaning business may use a number of retailers (agencies) to handle customer dropoff and collection. An agency, in terms of Fieldpine, is not simply a customer that purchases your products and services.
When an agency store is configured in Fieldpine, the agency has limited access to your retail system, allowing them to create sales for you. This allows tighter and faster sales reporting and stock control.
Within Fieldpine, agency stores are seperate retail environments that interact with your store(s), they are not directly part of your store network. This means you can restrict the flow of information to agency stores so that not all data is visible. Do you really want every agency to see the complete details of every customer?
How to crete a new Agency
Step 1 - Prepare your store to communicate with the Agency Store
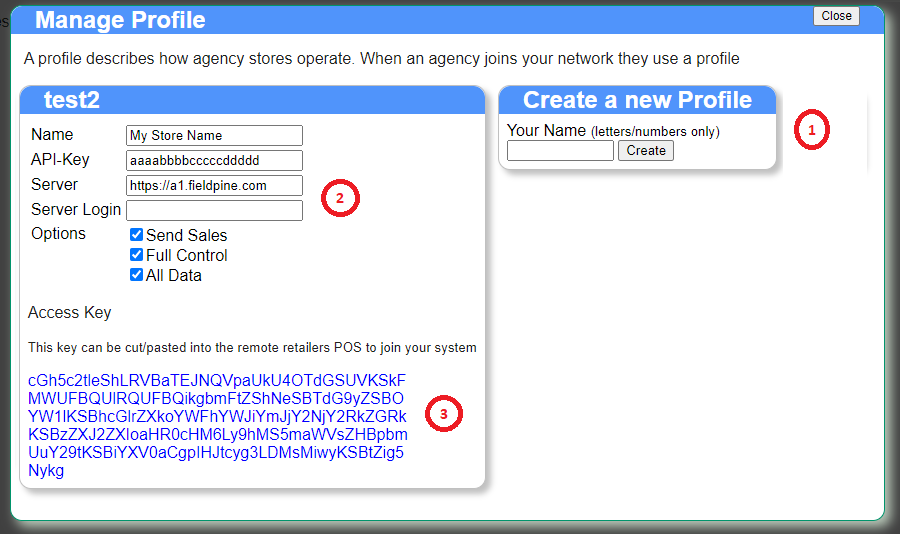
From the Stores setup page, click Agencies. A screen similar to the following will open. This lets you define the various technical parameters an agency store needs in order to connect

Create a profile if you don't already have one. The profile name should be only letters and digits without any punctuation. You might like to call it something relating to the agency chain. If you have multiple independent agencies, you might like to create a seperate profile for each one - the reason is that the passwords and API keys are contained in the profile, and if you wish to block someone in the future you do this at the profile level.
Once you have a blank profile, fill in the details
Step 2 - Setup the agency retail system
If required, install Fieldpine at the agency.
Step 3 - Have the agency install your details
In step 1 we created an access key defining how to communicate to your store. This AccessKey needs to be installed into the Agency Fieldpine system. From the manage profile screen in step 1, view the profile and copy the access key.
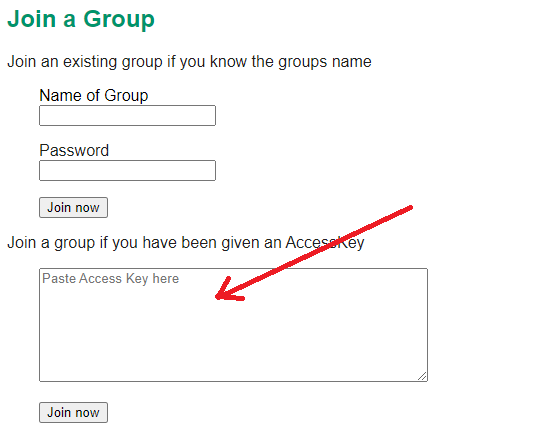
Login to the agencies Fieldpine server, and select the option "Retail Memberships". On this screen is an area where you can paste the AccessKey and apply it, as shown below

Step 4 - Fine Tune the setup
Optional/Advanced.