How to Manually Install the Excel Addin
The FieldpineExcel addin is a file added to your computer that Excel uses to process specifically added formulas. To install manually the broad steps are
- Open Excel and determine if you have 64 or 32 bit Excel installed
- Download the correct Fieldpine File to match 64 or 32 bit
- From within Excel, tell it where to find the Excel addin
- Configure the addin with your server addresses etc
Prerequistes
- You must be running a locally installed version of Excel. Online office-365 does not support advanced Excel Addins.
- You must using a processor that supports Excel addins. Microsoft only permit Excel Addins on x86 processors. Most computers are x86 processors.
Step 1 - Identify if you have 32 or 64 bit Excel
-
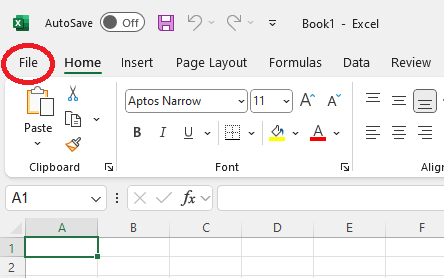
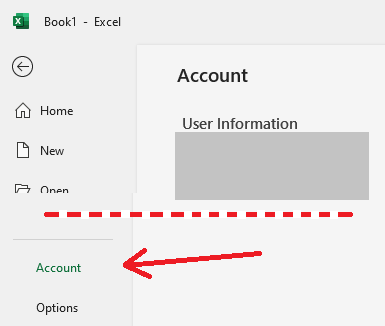
Click the file button top left, and then the "account" link at the bottom of the menu that appears
-
The 64/32 details are shown at the top of this screen

Step 2 - Download Fieldpine Excel Addin
Download Excel Addin 64 Bit or Excel Addin 32 Bit
Copy this file to a safe location, we recommend creating the folder c:\fieldpine and placing it in there.
Do not use the file from the "Downloads" folder that
browsers will typically save this file too.
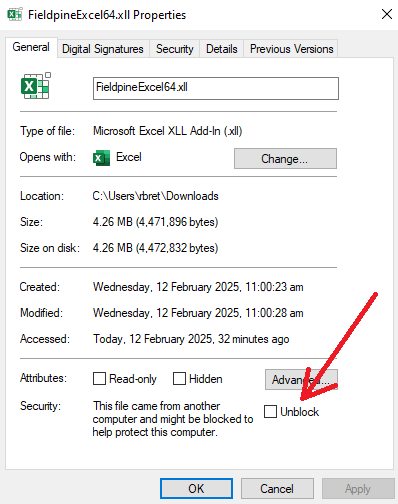
Tip, after copying the file to its final destination, Excel might decide to block it. From Windows Explorer, right click the file and select the "unblock" option if present. See this Microsoft Support article for more information.
Step 3 - Configure Excel to add the Addin
-
Start Microsoft Excel.
-
Depending on which version of Excel you have either
-
Click the file button top left, and then the "options" link at the bottom of the menu that appears
-
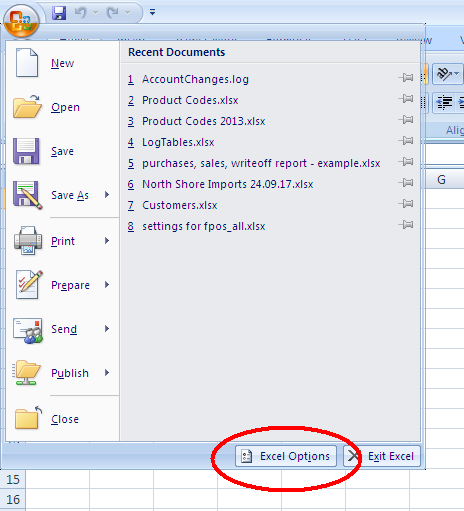
Or click the Office Button at the top left
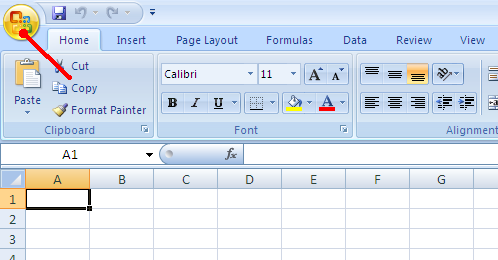
And then click the Excel Options button
-
Click the file button top left, and then the "options" link at the bottom of the menu that appears
-
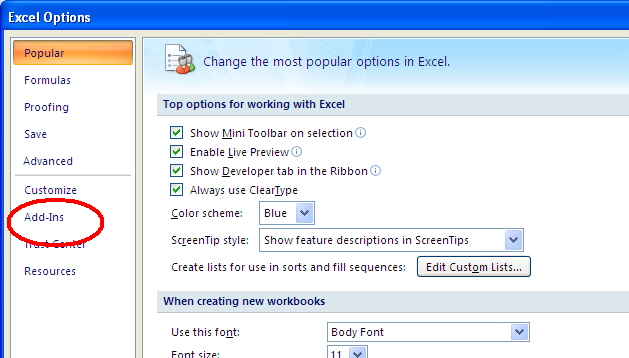
Click Addins on the menu screen that appears. The exact position will vary slightly depending on your version of Excel
-
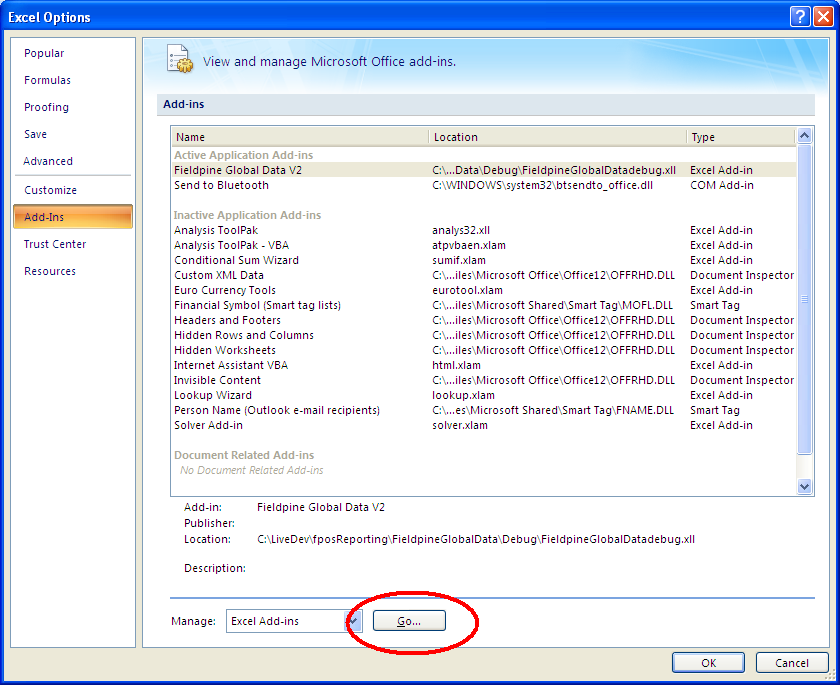
At the bottom of the screen, click the "Go" button beside Manage Excel Add-ins
-
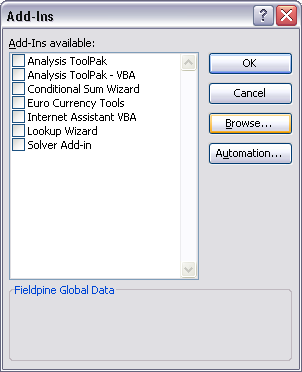
A screen similiar to the following should appear, press Browse to locate the AddIn XLL file on your machine.
-
Using the Browse screen shown below, locate the file FieldpineExcel64.xll or FieldpineExcel32.xll on your machine.
The path shown in the picture below should be where you saved the file, not the one shown.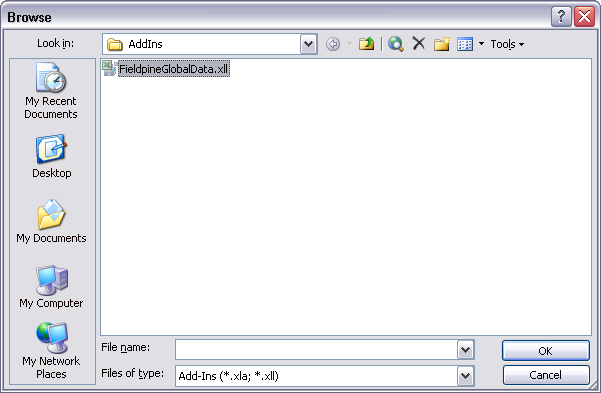
-
Press OK on the Add-Ins screen (shown in Step 3 above) and the installation is complete.
- A new menu option, Fieldpine Retail will have appeared on your Excel menu under "Add-ins". From this menu you can add and remove and servers you may have access too.
Step 4 - Configure the Fieldpine Addin
-
From the Excel menu, select Add-Ins and then Fieldpine Retail and then Configure Server
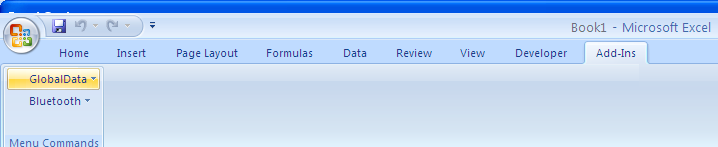
Your menu bar may appear differently depending on which version of Excel you have - Your browser will open a Web page to let you configure your Excel Configuration.
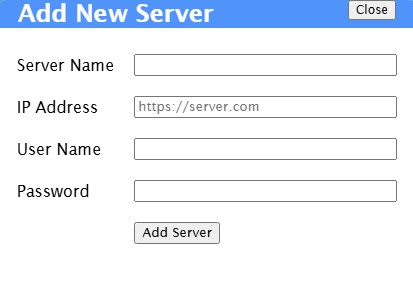
- Click the "Add Server" button, and a screen such as this will appear
-
Fill in the details
Server Name - A friendly short name you refer to the server as. This is only a prompt for you, and mostly helpful if you define multiple servers
IP Address - The IP address or domain name of your Fieldpine Retail server
Username/password - Access details if required
Step 5 - Check it is OK
Open a blank Excel Spreadsheet and paste the following formula
=Pinboard("product.description",2)
The number 2 is a product id, so you might get a blank if you do not have a product #2, but you should not get any excel errors.